Showing posts with label cream. Show all posts

Thursday, 7 July 2016

Wedding Day Mementos Box

If you have a close friend or family member who's soon to become a bride, making a one-off wedding mementos box is a wonderful gift idea.

Finding the right box is the hardest part, your local craft store may have something suitable but if not, use your imagination, you may already have something in your own home that you could use for the project.

I made one recently for my cousin from a wooden 'sewing box'  that I found in my local store which was just the right size to keep all those special wedding day items and it had a hinged lid - even better!.  With a few coats of paint and some decorative additions, my little box looked great and was just what I wanted for a personal touch for my cousin.

Below are some photos of the finished box, to be honest they don't do it any justice, its much nicer than it looks in the pics.  Unfortunately, I accidentally deleted the photos of the box prior to decoration.


Bye for now

Monday, 14 March 2016

Ribbon Roses

When I first came across these satin hand made roses I was struck by how lovely they were and how real they looked and immediately wanted to try to make my own. The only ribbon I had to hand was an inch wide which was half the required size but I was eager to try it right there and then so that's what I used.  It was quite tricky to maneuver the small sized ribbon but eventually I got there ending up with this small sized rose...


I will be making bigger versions of these lovely ribbon roses once I get some 2 inch ribbon stock and I will be posting details on how its done, so keep a look out on the blog.  Hope you enjoyed reading this.

Bye for now


Wednesday, 26 November 2014

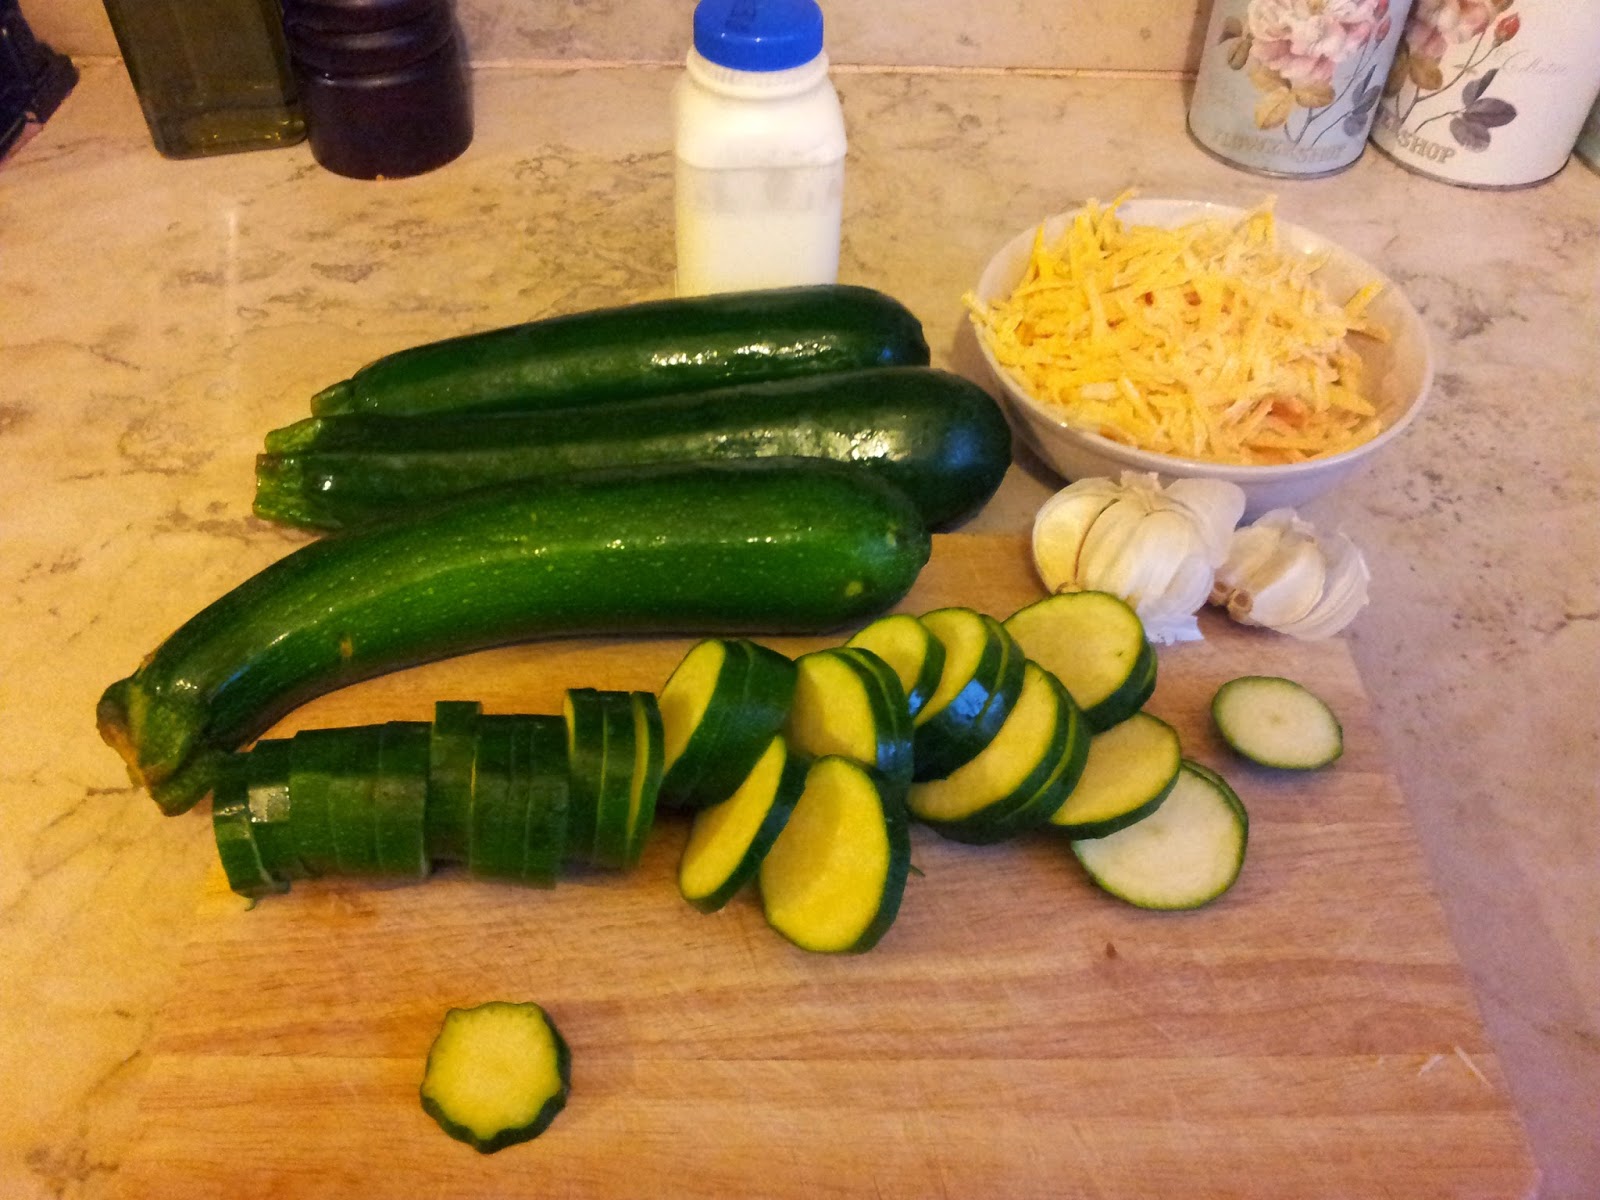
Courgettes (Zucchini) In Cream

This is one of my favourite dishes but I don't cook it often and you'll see why after you've made it and eaten the entire dish yourself!  It is so simple and yet so delicious and unfortunately high in calories.  I learned how to make this one in France where emmental cheese is used in it but you can use cheddar if you prefer. In recent times I have been leaving out the garlic as I think it overpowers the flavours a bit - a small clove is enough if you do decide to use some though.  The ingredients below make a small dish and are approximate as I don't measure the cheese or the cream I just know by now how much to use.

3 Courgettes
125ml Fresh Cream
Approx. 1 Large Cup Grated Emmental or Cheddar
Salt
Pepper
1 Small Clove Garlic

Wash the courgettes and slice them.  Put them into an ovenproof dish, add some salt, a little pepper and the crushed garlic clove (if required) and pour the cream over the lot.  Give it a stir to ensure that the courgette slices all have a coating of cream.  Flatten them down into the dish a little and cover with a layer of cheese.  

Cook in the oven on 190 deg. C/gas mark 5/375 deg. F until the cream has evaporated and the top has formed a golden crust.

I serve this with a large baked potato.  It freezes well too (if there's any left)...

Sunday, 1 June 2014

Pine Bedside Lockers - Revamp Completed

I'm delighted to finally post pics of the finished bedside lockers.  I decided on a deep red for the drawer fronts and couldn't find the right red.  Eventually, I mixed a deep plum with some fire engine red and came up with this colour which is exactly what I had in mind.

I thought long and hard about what to do with the drawer knobs, I thought about découpaging them like I did for the Chest of Drawers revamp which really turned out great but in the end I decided to do something different  and hand paint a design onto them - a very steady hand was needed for this and let me tell you, I don't have one!!   To say the least, it was quite a challenge, so they're not perfect but I think that just adds to their overall finish rather thank taking away from it.  I used a pencil to outline the design and then filled it in with a very small paintbrush.  I suppose I could have used a marker but it would have felt too much like cheating.

For the finish I used a dark French antique wax.

If you would like a piece of furniture finished in this style, please contact me by email.  The details can be found on the Contacts tab on this Blog.  Please scroll down to see all of the photos.


Thursday, 22 May 2014

Bedside Lockers - Painted

I've painted them! I had to mix up four different beiges/creams to make up enough to cover both pieces as I didn't have enough in any one colour and when I am in the mood to paint I need to do it right there and then and not wait around for paint to be bought.  Again, I added my usual mix of Plaster of Paris to make up a nice chalk paint.  I've left the drawer fronts as I'm doing them in another colour like I did with the Chest of Drawers.  I think they look better already!


Let me know what you think below or go to my Facebook page here to 'like' or leave a comment.

Monday, 21 April 2014

Chest of Drawers Makeover - Distressing

Easter took up quite a bit of time in my schedule and I did enjoy every minute decorating the eggs and making the little bags.  However, I'm delighted to get back to the furniture - the pine chest of drawers was what I was working on last (among other things!) and as I have a queue of other things to do I'd better get along with it!

It it coming along nicely and in the pics below you can see where I have put the knobs back and started some distressing at the edges.  A little more distressing around the drawers next and then I will move on to the next stage. Looking good so far.  Hope you enjoy looking, come back soon for more on this lovely little piece.


Wednesday, 2 April 2014

Chest of Drawers Makeover - Drawer Interiors

In my last post on the chest of drawers I had painted the body of the chest cream with some homemade chalk paint and I had painted the drawers using two colours - cream for the sides and edges and for the fronts, a taupe (also using my homemade chalk paint recipe).  I was going to just leave the insides unpainted but they looked a bit unfinished so I painted the interior sides of the drawers taupe and then I lined them using the wallpaper that I had used on an earlier project.  This is how they looked during and after.


I think the wallpaper made a big difference and finished it off nicely.  Happy days! Come back soon to see my next post where I will be doing something different with the drawer pulls/knobs.
Thanks for looking.